Batch Process your DSLR- or Flatbed-scanned Negatives with Bridge and Photoshop
Create nice negative conversions with my Actions Pack. Free to download here.
There are many options when it comes to converting your scanned negatives into positives. Flatbed scanners usually come with a dedicated Software such as EpsonScan, SilverFast or VueScan. But what to do when you do not have this kind of software? What if you want to scan your negatives with a DSLR or you simply do not like the results of your Scanner software? And the most important point, you do not want to spend any money on additional software?
The answer is using a well-created Photoshop Action together with Adobe Bride.
This combination enables you to do Batch Processing, which basically means you will be able to automate the inversion from negatives to positives on a big amount of pictures so that in the end you do not have to process every single picture by hand. All of this for free!!!
- In this Blog entry i will:
- Provide you with a nice and free actions pack
- show you how to install the Actions
- show you how to do batch processing.
- quickly talk about the two major pros & cons of this method. (yap where there is light there are also shadows :-P )
Below you find the Video of my recorded live stream, just in case you prefer video over reading. (i do not show how to install actions in the video!)
Lets Start!
Step 1, Installing the actions pack.
After downloading the negative to positive actions (Film-Tools-lite) you simply unzip them to your hard drive. After unzipping them, simply double click the action icon, photoshop will open and the action should be installed and ready to use.
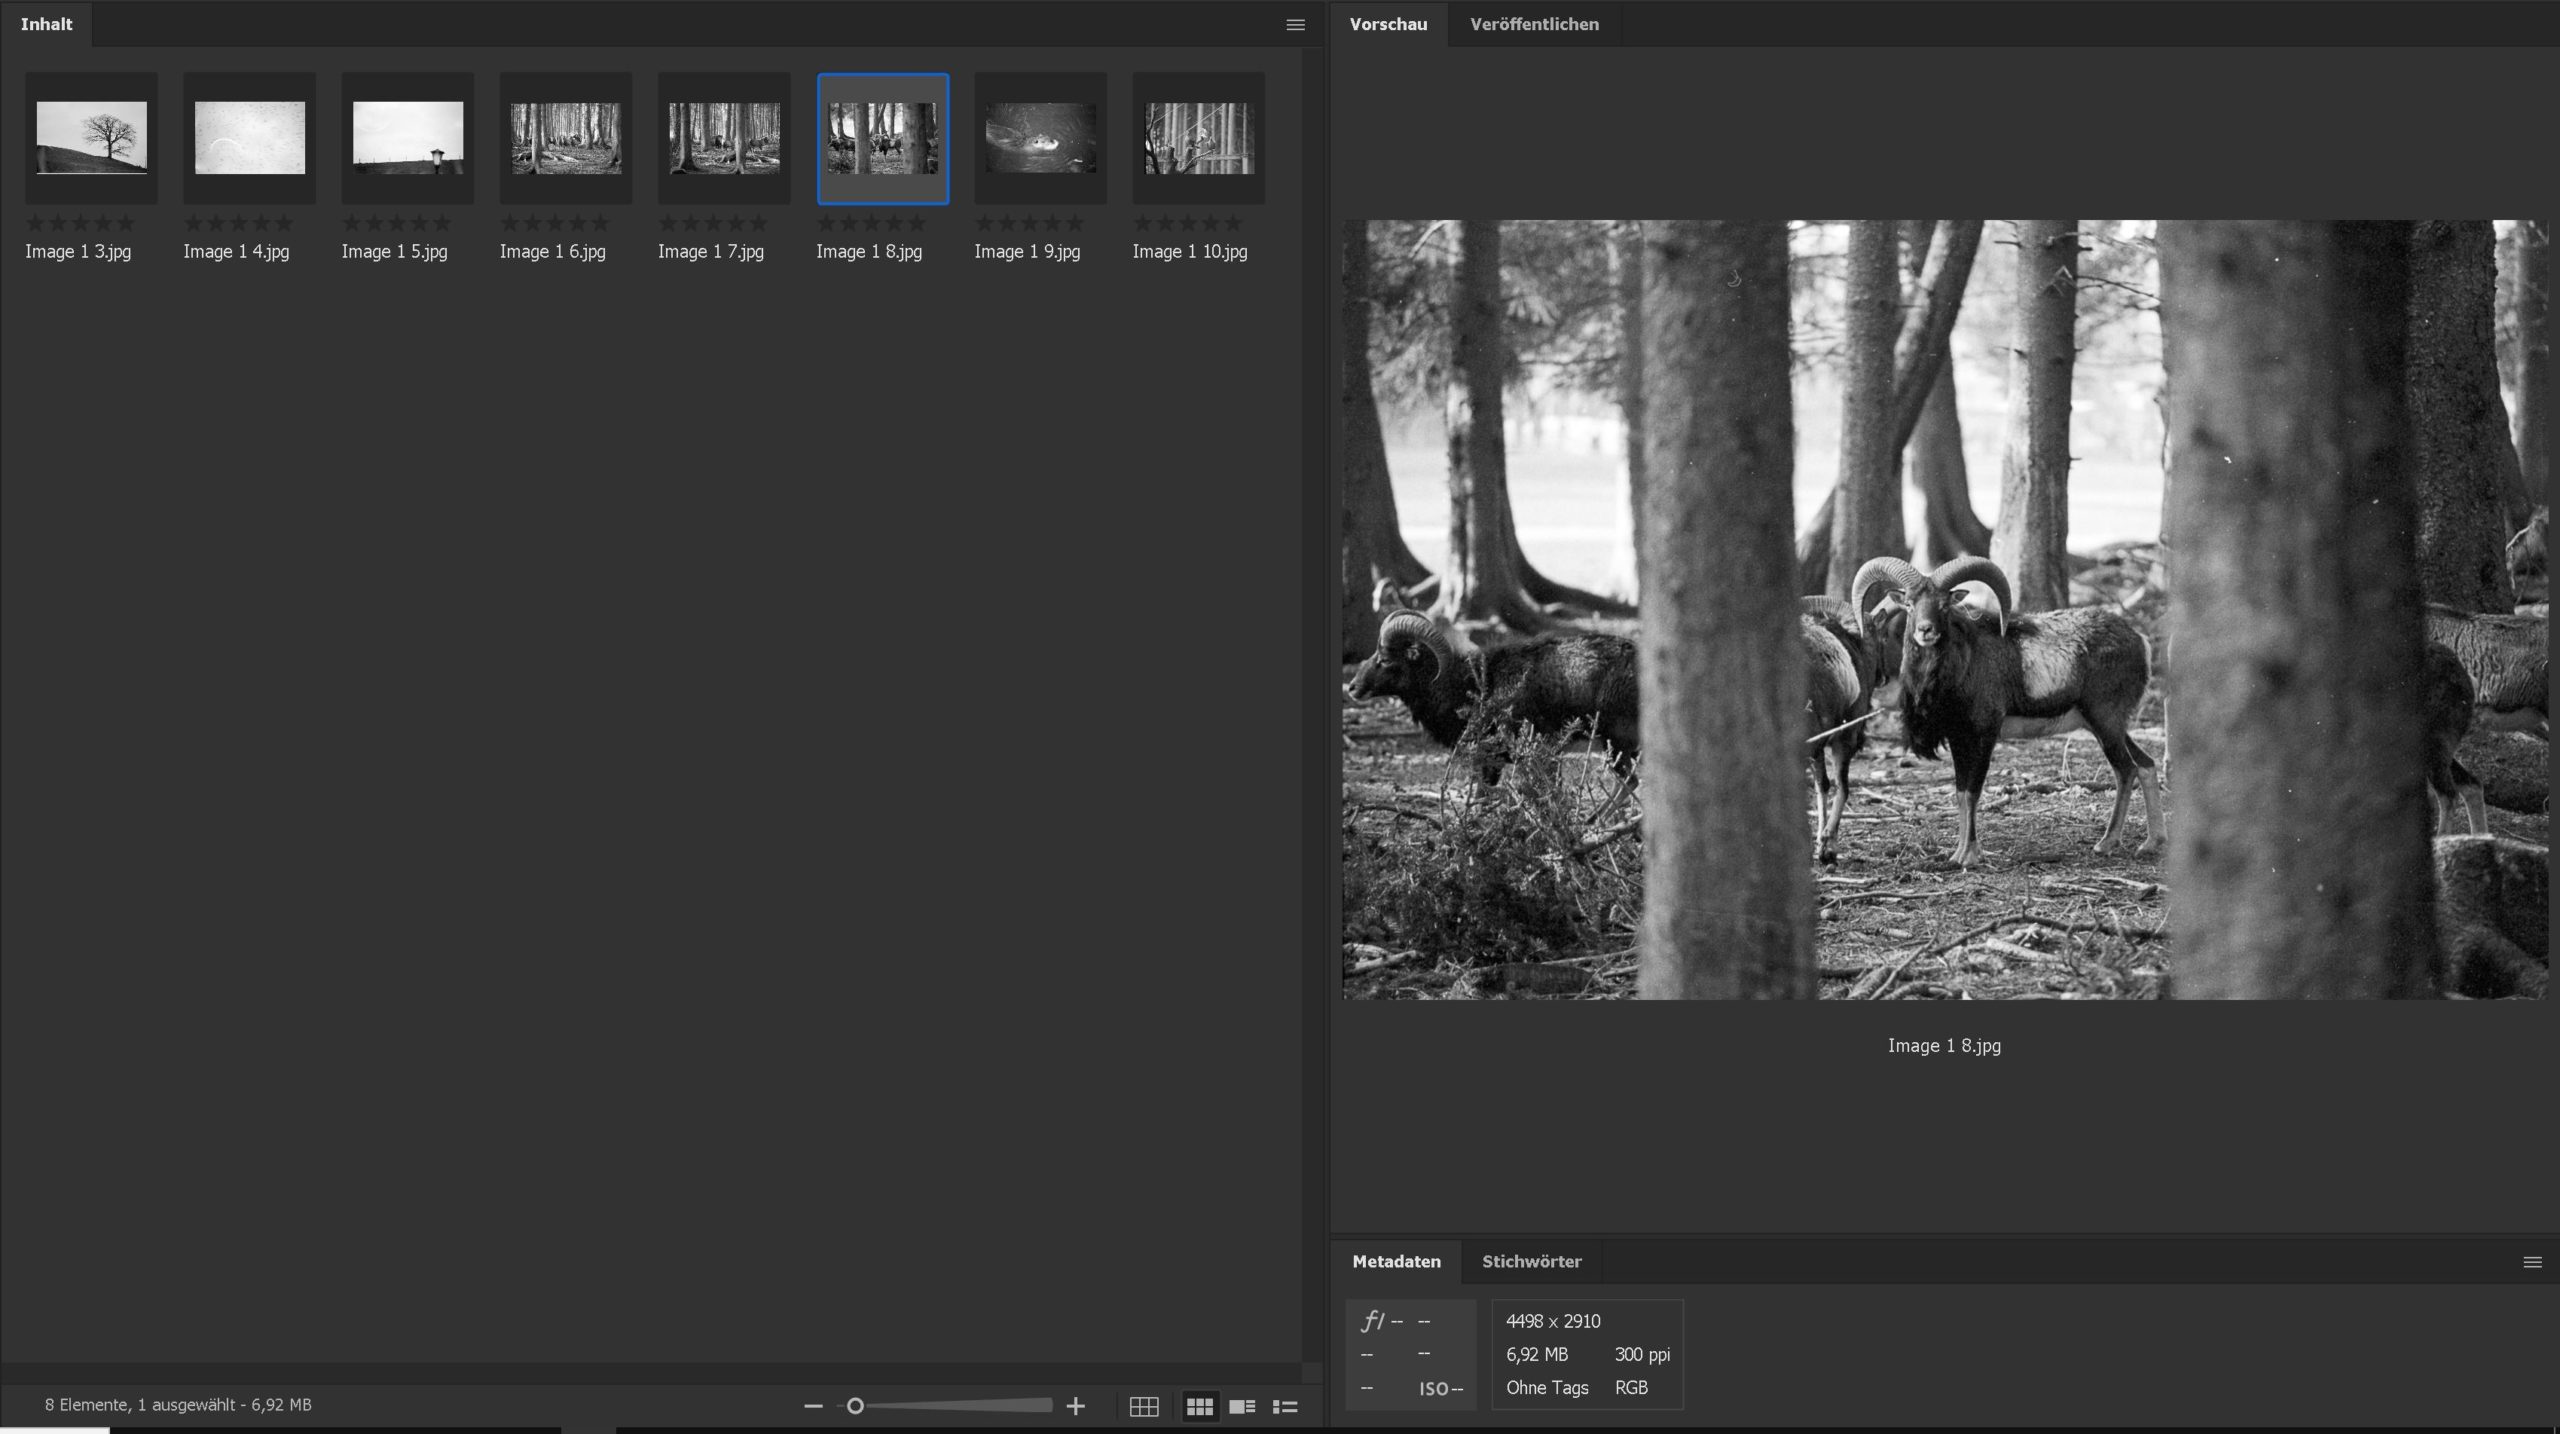
Step 2, Start Bridge
Now it is time to start Bridge and to navigate to the Folder containing the images you want to process.
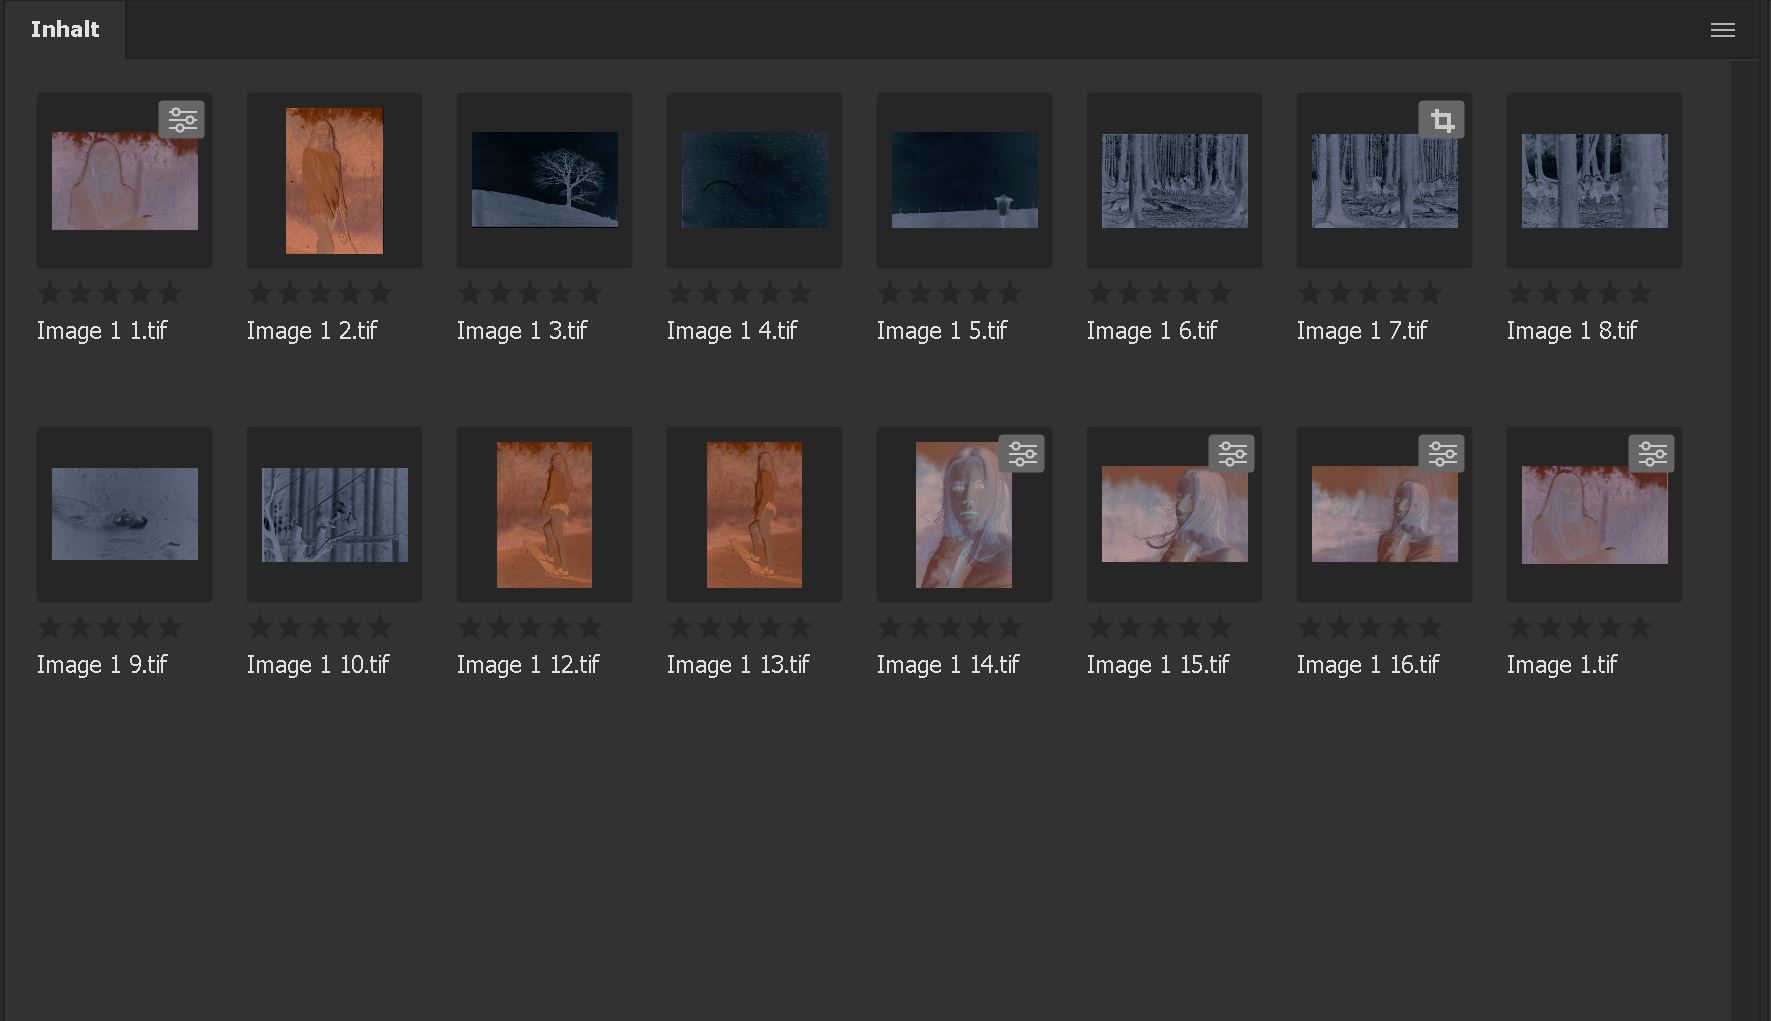
Step 3, Select the images you want to process.
Now simply select the images you want to process. Therefore press ctrl on your keyboard and select multiple images with your mouse. Or to select a row or multiple rows of pictures select the first picture of a row or group, then press “shift” on your keyboard and select the last one. Now all pictures between the one you selected first and the one you selected while pressing your “shift” key, should be selected.

Step 4, Open the Image Processor
Now open the image processor, you will find it under:
Tools -> Photoshop -> Image Processor

Step 5, the right settings
In the image processor tab choose the following settings:
- save to same location
- safe as JPG
- safe as PSD (optional in case you want to further edit the images)
- run action (choose the action you just installed.)
- hit “run” and the fun starts
You shhould find the action in the same path as on the image.

Step 6, check and enjoy your images.
The Batch process will now automatically create one (or two, depending on your settings) folder/s. These folders are labelled as JPG or PSD.
Go into these folders and check your images. If you find some images need further editing, go to the PSD folder, edit and export them. If you did not create a PSD folder. simply chose the negatives you need to edit and run the action again. But this time only create the PSD files.

Lets talk about the pros and cons of this method.
The pros are:
- fast processing of a big number of pictures
- it is free
- no additional software needed
The cons are:
- you only see the result after batch processing your images, so you have less controll over your result.
- you do not work with RAW-Data (the results are usually great, but you loose some room to play with)
If this Post or my action pack was helpful for you, please share the link to my blog and share my Videos. Thank you.
Muchas Gracias.
Estoy empezando con la fotografía analógica. MI idea es acabar positivando los negativos, pero de momento estoy haciendo fotos con un puñado de cámaras que he comprado y que me han regalado.